
Model Photo to AI Build Steps: Preparation & Fixes
Have a photo of a model you built? This guide helps you prepare it for an AI visual steps board and assembly video. A single photograph records visible surfaces; it does not provide hidden connections or an exact parts inventory. Decide how you will use the result before you generate it.
Choose the output you actually need
For a product showcase or creator post, check that the model remains recognizable and that the sequence communicates the idea. For instructions another person can build from, create or recover a verified model and document its assembly. The presentation workflow does not replace that work.
Check these six things before uploading
↔ Scroll sideways to read all columns
| Photo problem | Action | Ready when |
|---|---|---|
| Edges cut off | Step back and retake the photo. Leave space around the model. | Roof, tail, feet and other outer parts are fully in frame. |
| Hands or packaging hide the model | Remove the obstruction and photograph the model by itself. | No object covers a major external part. |
| Dark parts merge into shadows | Add soft light and choose a contrasting background. | You can distinguish the main edges without blowing out highlights. |
| Several subjects in one image | Photograph one complete target per image. | A viewer can tell immediately which model is the subject. |
| Exaggerated close-up perspective | Move back, retake, and crop unused background afterward. | The near end is not disproportionately larger than the far end. |
| Hidden rear structure | Record what is missing; use additional views for manual verification. | You do not treat unseen connections as confirmed facts. |
A practical preparation sequence
- Place the complete model on a plain surface. Remove loose parts, boxes and unrelated objects.
- Compare a front view with a slight three-quarter view. Choose the view that separates the important external shapes more clearly.
- Crop excess background while keeping every outer edge. Check that compression has not blurred the model.
- Open the public examples before subscribing. Compare their visual output with the asset you intend to publish.
- After generation, inspect the board at full size and watch the complete video. Keep a copy of the original photo beside the output.
Review the sample like a creator would
In the public coupe example, compare the black-and-gold body, roofline and wheel positions between the source image and the steps board. Then watch whether those features remain recognizable in the video. These are appearance checks; they do not verify hidden brick connections or a complete build order.
Explore sample outputs
No sign-in required.
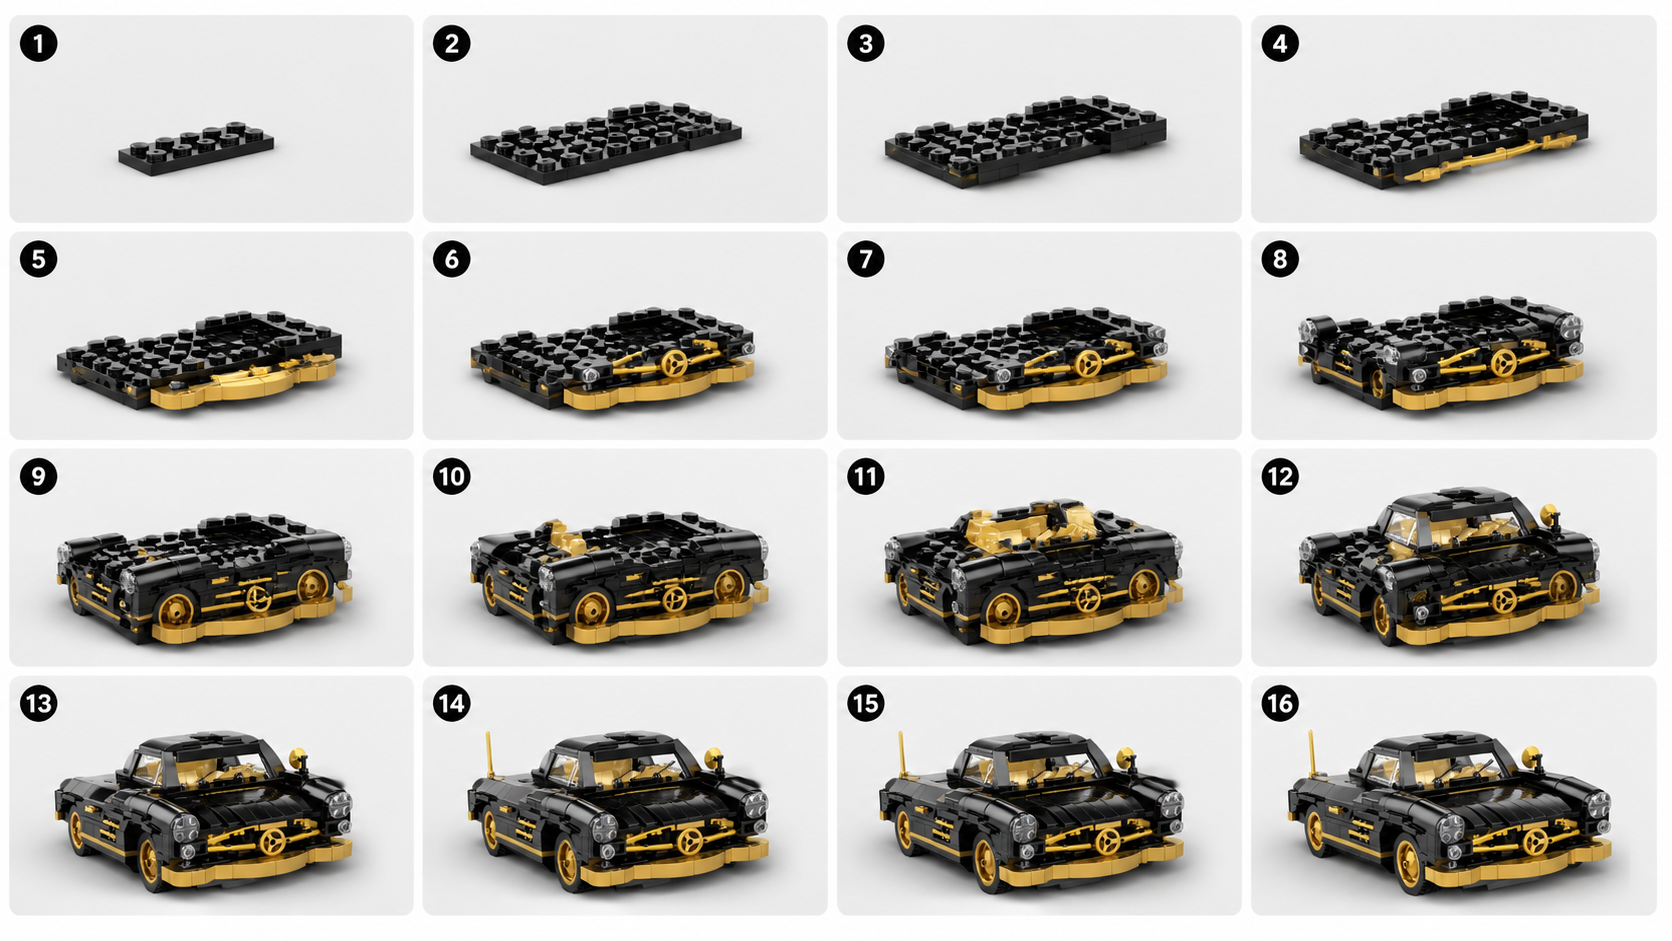
If the board or video looks wrong
↔ Scroll sideways to read all columns
| Output problem | What to do next |
|---|---|
| The body, colors or wheels change between stages | Identify the inconsistent stages. Simplify or retake the input, regenerate, and inspect again before publishing. |
| A large structure suddenly appears | The sequence omits an explanation. Use it as an overview, or replace it with documented assembly steps if a viewer must reproduce the build. |
| Unseen parts are drawn in detail | Treat them as unverified guesses. Do not buy parts or promise buildability based on that image. |
| The video changes the model shape | Regenerate or edit the asset. Do not use it as an accurate product demonstration until you have checked it. |
Decide whether the result is ready to use
- The source model is recognizable throughout the board and video.
- There are no obvious unintended changes in color, silhouette or major parts.
- The caption describes an AI visual demonstration and does not claim verified assembly instructions.
- Any claim about real assembly is supported by a separate physical or digital verification.